I’m working in a small startup with only two members. One is a full stack developer who is in charge of product development from server side to front-end. I, on the other hand, specialize in product management. Throughout my career, I’ve focused on product planning, strategy, roadmapping, and customer pipelines. But now, I have been creating product/interface/user experience design.
Of course, the best option is to hire a UX/UI designer or invite the person as a co-founder. But in reality, this is not always possible for a startup. And if you don’t take the role right away, your developer may think that he or she is responsible for the whole product from server side, front-end, iOS, Android, to even the website. So, I took on the role of a temporary designer for a start.

In this article, I’m going to share my tips on taking on a designer’s role as a person who does not have any background in design. All examples will be related to mobile app design. Again, these tips show you ways on how to temporarily take charge of design and not on how to become an actual designer.
To follow my tips, you need to be:
I’ve seen many product managers (PM) who draw kick-ass and cool-looking product descriptions and wireframes by using PowerPoint (or more modern tools like Invision and Framer nowadays). I’m not saying that these are wrong, but if there are only two members in your company, you will need to take three roles: design, product management, and marketing. In this case, drawing the cool-looking wireframes is a waste of time and resources.
I think the well-structured wireframe stacks are only necessary when there are enough members in a team, so that you can deliver accurate information to all members equally, or when you need to gain confirmation to proceed from higher managers or executive members.

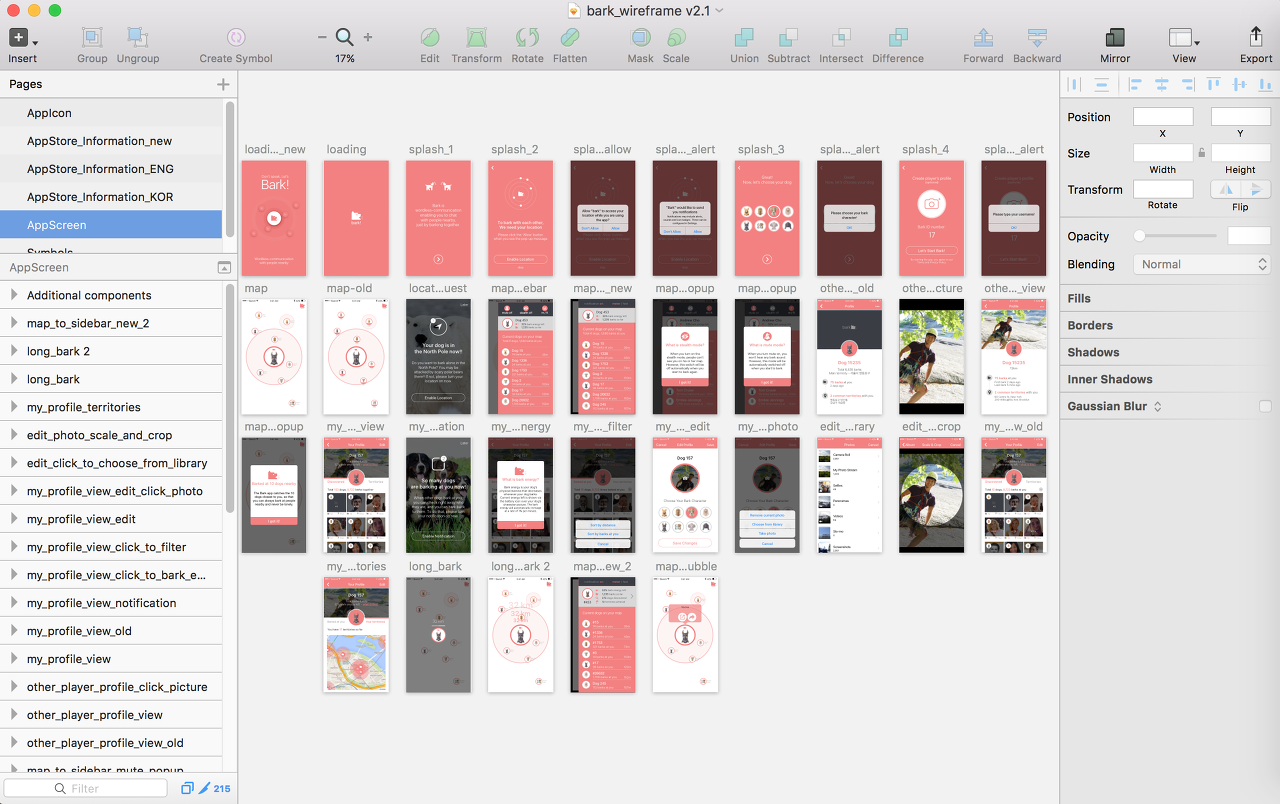
So, the best way for you to deliver your app idea to your developer as a temporary designer is to sit down together, write down the user’s main tasks, and draw very brief app screenshots together with your developer.
Decide on these things with your developer:

It’s time to start more designer-like jobs. You need to collect some reference design work from design archive websites so that you can use the works made by professional designers as benchmarks. Here are the three archives I use:

CollectUI is a design archive for web and mobile products. The best thing about this site is that all the designs are classified under individual sections like sign up, onboarding, checkout, etc.

Behance is popular now even with non-designers, but you may not know about its archives, Interaction Gallery. This archive was started from AppDesignServed.co, with beautiful and full-sized mobile and web designs. In this archive, you can find artwork that has similar features or user flows with your products.
You may know Pinterest very well. The most convenient part of it as a design archive is the powerful search engine. You can use very specific keywords to find a specific design. For example, if you’re looking for something related to app onboarding screens on chat app for iOS, you can input a keyword like “mobile chat app onboarding iOS.” Pinterest can return some similar-looking designs by using image recognition search.
Now, it’s time to purchase a very necessary design tool, Sketch 3. It’s a vector-based design tool, specialized in web or mobile product design.
You may think, “Why not Photoshop or Illustrator?” First, you need a vector-based design tool because you need to provide design components that are working for multiple screen sizes. In this case, some pixels may be broken if you use a non-vector-based program like Photoshop.
Illustrator is also a vector-based design tool but it requires a learning curve if you are not familiar with it. Illustrator is not just for web/mobile product design but also for broader areas such as graphic illustration, logo, or different art works.
The most important step is to choose your main and sub-color. It is very important to understand what the main color is but you don’t have time to learn complicated color theories. Don’t worry. Just keep these simple rules in mind when choosing your color theme.
This will be your main color. When you imagine Starbucks, Facebook, or Snapchat, you can easily see their representative colors —green, blue, and yellow, respectively. These brands use only one distinctive color and that helps to create a visual representation.
Do not choose multiple distinctive colors. Choosing more than two main colors is an extremely difficult skill that only highly experienced designers can do. If you try using multiple main colors, your design might look tacky.
These are called achromatic colors, which means color without color. An achromatic color as sub-color looks good with any distinctive colors.

Here are some great websites that are useful for searching main colors:
On this website, you can see so many great color spectrums. Again, do not use all the suggested colors because it may be too difficult for us (non-designers) to make the design look good. Just keep looking at the top colors on each spectrum.
It’s a very useful website that suggests only one color whenever you press the space bar. Keep pressing the space bar and write down the HEX code when you find a great color to use.
OK, now you are a temporary designer for your team, so let’s figure out the actual design work you must do for your developer.
So, the first thing you should do is to create an app logo and deliver it in multiple sizes. Actually, logo design is one of the top-level design works, which means it will be too difficult for us, people with no background in design, to create proper and cool logos. So, just focus on creating a simple but distinctive logo. Here are some tips:
For example, Medium’s original logo was just a plain letter M on a black space. It’s a very useful way for users to recognize and remember your app.

In the example above, the first logo is the reverse and the other uses green as the main color on a white space. Actually, using white space may capture user’s attention more because so many apps are using the reverse style nowadays. But it is still a case-to-case basis.

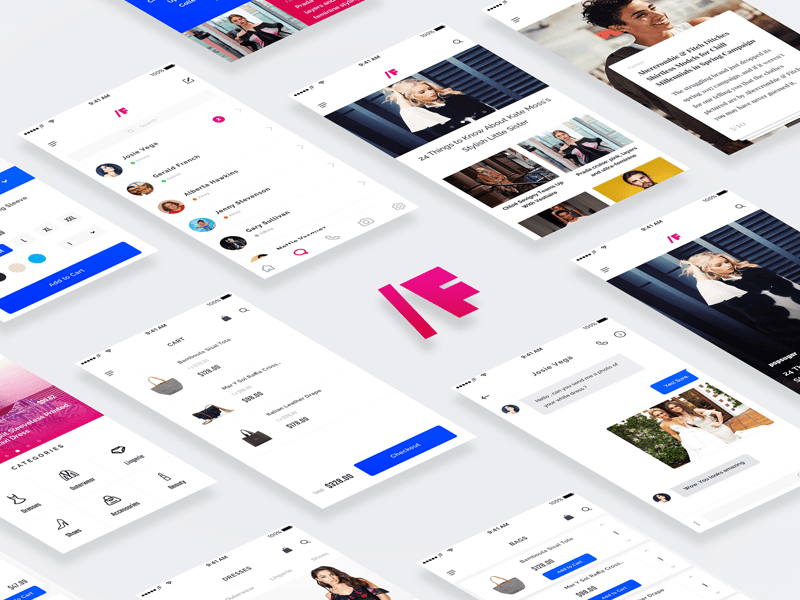
Now, you need to design all app screens by yourself, but it will be extremely difficult to do so from scratch. I then recommend using a UI kit that a designer made. You can search so many free or paid for UI kits on Google, but here are my recommendations where you can find UI kits in Sketch 3 format.
You can download a well-designed UI kit package in Sketch file format. Although it’s usually free to download the files, you may be required to pay royalties later. Please read the license statement carefully when you are downloading.
Also, you need to choose a UI kit based on these criteria:
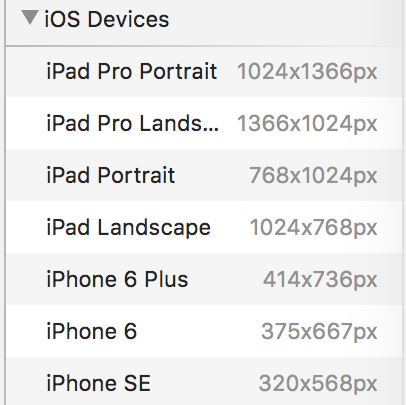
Before you start your design, please decide on the base screen size. Some developers like to have iPhone 5 SE size as the base while others like iPhone 6 or 7 (the bigger screen size). My developer likes the first style because he can use a small screen design and apply that to the bigger screen by using auto-layout.
While you design (or just modify) using a UI kit, you may need to draw icons or buttons, but do not draw by yourself. This also requires a high-level design skill. Instead, I recommend using Noun Project, an icon design archive. You can download a variety of icon components as an SVG vector format. Remember to check the license announcement before using them.
Finally, this is the last step you need to follow. You should deliver these two design works:
Zeplin.io can help you deliver the design guide. Once you’ve finished designing all your app screens on Sketch, you can simply press CMD+E, then all the screens will be uploaded on Zeplin. Your developer can see all kinds of information about your design such as size/HEX code and spacing, among others.
Now, you should deliver design files generated from all of your design components. If you are making design components for an iOS app, you need to export them as double- and triple-sized .png files. Sketch makes this task easy. Once you click on the component, look at the Export tab at bottom right of the page. Change export destination to iOS, then you can change the file settings automatically.
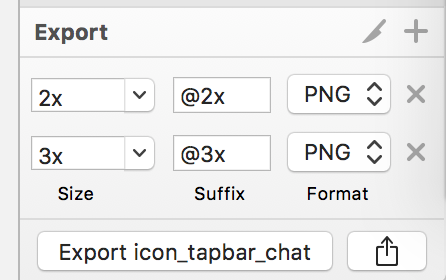
You need to be careful when creating the file name during this task because every developer has his or her own way of naming components. You must ask your developer about any rule on naming files before exporting the design files. Otherwise, you can just name the files this way:
[Type]_[Section]_[Details].png
For example, if you export an icon on the tab bar area, the file name is likely to be “icon_tabbar_home@2x.png.”
Once you have more than two full cycles of all these steps, you may become a temporary designer on your small team that does not have a professional UX/UI designer. Also, this will give you (as a product manager or product owner) a sense of the user interface structure and experience flow of your product.
Sign in to read this article & enjoy the following: